


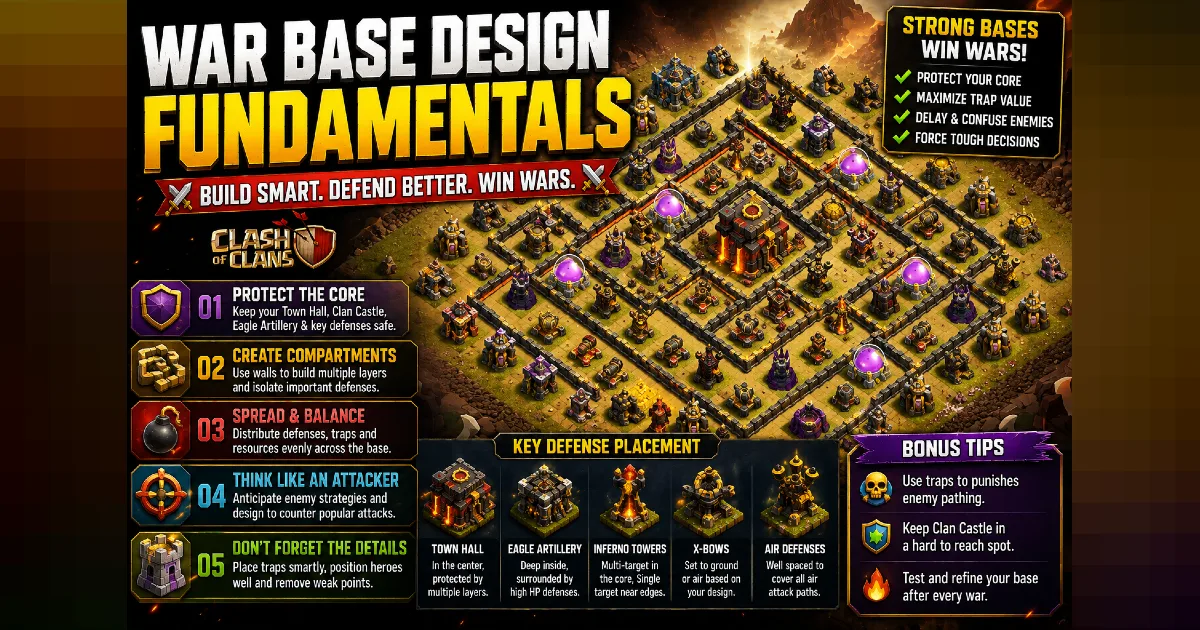
In Clan Wars, your base attacks twice as often as you do. Every enemy player who hits it is an attack you defend without lifting a finger, and a single failed attack against your base can decide a close war. Yet most players spend hours practicing attacks and minutes, if that, thinking about defense.
The good news is that war base design is a learnable skill built on a handful of stable principles. Attack strategies come and go with every update, but the fundamentals in this guide — compartments, funneling denial, pathing manipulation, and trap logic — have decided wars for years and will keep doing so.
What a War Base Is Actually Trying to Do
A war base has one job: deny the third star. In most war setups, attackers will eventually take two stars against almost any base. The difference between a good war base and a weak one is how reliably it stops the full clear. That reframing matters, because it changes what you optimize for. You are not trying to stop the attack at the front door; you are trying to make sure the attack dies before one hundred percent.
Everything below serves that goal: make the attacker's plan break down in the second half of the raid, where their spells are spent, their heroes are low, and the clock is running.
Compartments: The Skeleton of Every Strong Base
Walls do not stop armies; they slow them down and steer them. A base built as one big walled box gives the attacker a single decision, and once they breach it, everything inside dies together. Compartments change that math.
Why Compartments Win Wars
- They cost time. Every wall the army has to break or every detour it takes burns seconds, and failed attacks in war usually fail on time.
- They split the army. Troops path around walls in ways attackers cannot fully control, and a split army loses its healing, its funnel, and its punch.
- They isolate your key defenses. A defense in its own compartment has to be dealt with separately, instead of falling as a bonus while the army walks past.
Compartment Design Rules
- Prefer several medium compartments over one giant core or a dozen tiny cells. Tiny cells waste walls; giant cores waste opportunity.
- Put your Town Hall and your strongest defenses in separate compartments, so no single breakthrough claims both.
- Vary compartment shapes. Long thin compartments stretch armies out; square ones stall them. Mixing both makes pathing hard to predict.
Funneling Denial: Fight the Attack Before It Starts
Almost every serious attack begins with a funnel: the attacker clears buildings on the edges so the main army walks into the core instead of skimming around the outside. A well-designed war base makes that funnel expensive.
Spread your outer buildings so that clearing a clean entry lane requires real investment — heroes, siege support, or a meaningful slice of the army — rather than a couple of cheap units. If the attacker spends a third of their army just creating the funnel, the core push arrives weak. If they skip the funnel to save troops, their army wanders sideways and the attack unravels on its own. Either outcome favors you.
Defense Synergy: No Defense Should Stand Alone
Individual defenses are removed easily; overlapping defenses are not. When you place a defense, ask what protects it and what it protects in return.
- Pair splash damage with single-target damage. Splash defenses shred swarms but melt to tanks; single-target defenses do the reverse. Together they answer everything.
- Layer air coverage across the whole base. Air attacks punish bases whose air defenses cluster on one side. Spread air-targeting defenses so no approach path is safe.
- Keep your hardest-hitting defenses toward the center. Central placement maximizes the time they spend firing before the army reaches them.
- Position defensive heroes and garrison-style defenses where they intercept the likely core push, not where they die alone on a flank.
Trap Logic: Punish the Obvious Path
Traps are the only part of your base the attacker cannot scout, which makes them your best tool for breaking a well-planned attack. The key is to stop scattering them and start placing them with intent.
- Find your base's natural paths. Look at your own layout the way an attacker would: where would a ground army enter, and which lane leads to the Town Hall? That lane is where ground traps belong.
- Put air traps along air lanes, not around air defenses. Attackers expect traps near the obvious targets. Placing them one step earlier on the flight path catches armies at full strength.
- Save your biggest traps for the mid-raid moment. A devastating trap at the entrance gets absorbed by cheap units. The same trap two compartments deep hits the core army when it can least afford the loss.
- Review and move traps after every war. If a trap never triggered, it is in the wrong place.
Common War Base Mistakes
- Copying a popular base without changes. Widely shared layouts get practiced against. If you start from a copied design, at minimum rearrange traps and swap a few interior buildings.
- Exposed Town Hall on a base meant to defend it. In wars, the Town Hall is the third star. Keep it defended, not decorative.
- Dead zones with no defensive coverage. Any area your defenses cannot reach is a free staging ground for the attacker.
- Never updating the base. A base that has defended the same way for months has been solved by someone. Iterate.
How to Test Your War Base
Use friendly challenges. Post your war base in clan chat and ask clanmates to hit it with the strategies you fear most. Watch the replays and note where the attack gained momentum: that is where your next change goes. Two or three rounds of this turns a decent base into a genuinely hard one. If you want a proven starting point to iterate from, browse our base layouts and then customize the traps and interior to make it yours.
Frequently Asked Questions
Should my war base be different from my farming base?
Yes, always. A farming base protects storages and accepts losing the Town Hall; a war base protects the Town Hall and the third star above all. One layout cannot do both jobs well, so maintain separate layouts and switch as needed.
Is it bad to copy war bases from the internet?
Copying is a fine starting point, but popular bases get practiced against, and their trap positions become common knowledge. Copy the structure, then change trap placement and shuffle interior buildings so the base defends like an original.
How often should I change my war base?
Change it whenever it gets three-starred in war, and refresh it periodically even when it holds. Small changes — moved traps, swapped compartments — are usually enough to invalidate whatever plan beat it last time.
The Bottom Line
War base design rewards thinking, not luck. Build compartments that cost time, deny easy funnels, make your defenses protect each other, and place traps where a smart attacker has to walk. Then test, watch replays, and iterate. The same defensive instincts transfer directly to your clan's shared village, too — see our guide to leveling the Clan Capital to put them to work on Raid Weekends.